This article describes the definition and usage of GDL standards at b-prisma.
Introduction
This documentation contains technical standards and design specifications that must be observed when programming GDL for ArchiCAD library elements (GDL objects) created at b-prisma.
Furthermore, some rules and recommendations are described that are not mandatory but recommended. All standards, rules, recommendations, and specifications that are NOT binding but only have a recommendatory nature are indicated by italics.
This documentation was created to ensure a uniform standard in scripting so that all involved GDL programmers and other project participants can always access the same standard and find their way immediately.
Moreover, it is recommended to follow the Graphisoft documentation "Library Design", "Library Specification", "GDL Style Guide" and "GDL Advanced Technical Standards" insofar as they do not say anything different than the b-prisma standards.
Naming Conventions
Over the years, a naming convention has become established at b-prisma that partly adheres to Graphisoft specifications but deliberately deviates from them in some respects.
The type of naming and capitalization is intended to provide maximum clarity and understanding of the scripts and parameter and variable names.
General Principles
- all commands and global variables are written completely in uppercase letters to distinguish them from parameters and variables
- all parameter names and variable names are either written in mixed case or lowercase; complete uppercase writing is not allowed
- all objects must be provided with the name of the developer and the date of last modification, if applicable a version number
Parameters
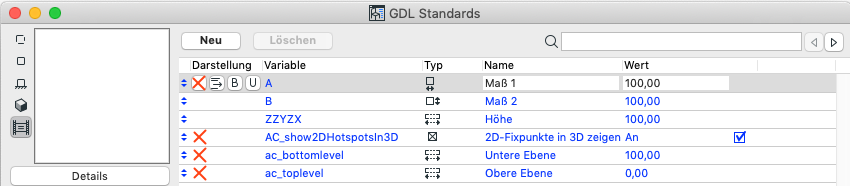
- All parameters start with a small identifier that indicates the parameter type, followed by an underscore, structured from general to specific.
- the 2nd part begins with a capital letter and describes the function
- the 3rd part begins with a capital letter and describes the component
- Example: str_TypFenster (not FensterTyp), str_Typ_Fenster is also allowed
Parameter Types
To distinguish parameter types in the script, these are given the following listed prefixes followed by underscore and designation as above.
- Length: x_Parameter, y_Parameter, z_Parameter
- Angle: ang_Parameter
- Floating point number: real_Parameter
- Integer: int_Parameter
- Boolean: b_Parameter
- String: str_Parameter
- Fill: fill_Parameter
- Material: mat_Parameter
- Pen: pen_Parameter
- Line type: lt_Parameter
- Building material: bm_Parameter
- Dictionary: dict_Parameter
- Profile: prof_Parameter
Variables
- all variables defined in the script start with a lowercase letter or an underscore
- the first part begins with lowercase and describes the function, the second part begins with a capital letter and describes the component
- Example: langProfil or _langProfil
- Exceptions: eps = 0.0001 and htsp = 0 (comparison variable and hotspot counter)
- Variables that occur only in a subroutine start with 2 underscores, e.g.: __iTuerTyp; alternatively ~typTuer is also allowed, _lang_Profil is also allowed
- Loop counters: loop counters should ONLY consist of lowercase letters without numbers and underscores; always start with i, followed by j, k, m and n. l should be avoided as it is difficult to distinguish from I and 1. For loops in subroutines, generally use double letters like ii, jj, kk or i_1, i_2, etc.
Styles
The following character styles must also be observed. While spaces require some additional effort in scripting, they significantly increase script clarity and thus readability. The same applies to section boundaries.
- Always put a space before and after =, as well as with arithmetic operators
- Wrong: IF i=1 THEN h[n + 6]=h+5 | j = - x | not (x)
- Correct: IF i = 1 THEN h[n+6] = h + 5 | j = -x | not(x) | s = MIN (a, 25 * b, c)
- No spaces are allowed before and after the following operators: Array indexing: array[25] logical "not": not(x) unary minus, unary plus: -x, +x
- Use code sections and section delimiters as follows: heading enclosed in dash lines, blank lines above and below dash lines, section delimiter text in UPPERCASE WITH SPACES in between, which further increases clarity, then code block name with >> at the beginning and code block name with << at the end:
! ---------------------------------------------------------------------- ! !SECTION DELIMITER
! ---------------------------------------------------------------------- ! !------CODEBLOCK 001--->>

!Code block goes here!

!<<---CODEBLOCK 001---
Script Headers
Each script should have a header so that it can be better distinguished in the XML version of the object.
! ---------------------------------------------------------------------- !
! -------- M A S T E R - S c r i p t --------------------------- !
! ---------------------------------------------------------------------- !
END lines should be created as follows:
! ---------------------------- E N D ----------------------------------- !
! ---------------------------- E N D ----------------------------------- !

END  ! -- END -- END -- END -- END -- END -- END -- END -- END -- END -- !

! ---------------------------- E N D ----------------------------------- !
! ---------------------------- E N D ----------------------------------- !
Subroutines should be separated from each other by double dash lines. The name of the subroutine can be a number or text in quotation marks. After this, the function of the subroutine must always be specified. For more complex subroutines, it is recommended to include a brief description as well as the passed and returned variables
! ---------------------------------- !
! ---------------------------------- !
! Creates a 3D door hinge,
! the moving part follows
! in subroutine 101
! passed parameters
! _durchmesserBand
! _materialBand
! Return values: none
! ---------------------------------- !
100: ! ------ D O O R   H I N G E -------- !
	! Subroutine code is indented
RETURN
! ---------------------------------- !
! ---------------------------------- !
Documentation in the Script
Each script section should be documented within the script through comments. It should be specified WHAT the script section does, HOW it does it, if applicable WHY something is done, WHERE there are links to and from this script section.
Always remember that you need to be able to recognize in 10 years what you were thinking today.
Indentation (Tab Jumps)
For control flow statements and loops, tab jumps should be used, if necessary in a staggered manner.
Examples:
FOR i = 1 TO anz
	ADDx (i - 1) * A
	! Code block
	DEL 1
NEXT i
IF strTypTuer = „Sliding door" THEN
       ! Code block
ENDIF

ADDx 1
ROTy 44
! Code block
DEL 2
Unfinished Work (todos)
For incomplete code areas, the keyword TODO should always be set as a reminder. This makes it easier to find the location, e.g.:
ADDx 1 ! TODO: temporary displacement; remove later
! Code area
DEL 1
Marking Related Commands
For longer script sections, related commands should be commented accordingly, e.g. for coordinate transformations and conditional sequences, e.g.:
ADDx _verschiebungRahmen ! co-trans 01

If Condition_1 THEN
	IF Condition_2 THEN
		! Larger code area
	ENDIF ! Condition_2
ENDIF ! Condition_1
DEL 1 ! co-trans 01
Parameter Script
Setting Parameter Values
If you want to change the value of a parameter using the PARAMETERS command in the Parameter Script, a similar setting must be made in the Master Script. This ensures correct display of the object in cases where the Parameter Script is not executed by the system. e.g.:
! Parameter Script
if Condition_1 then
	str_TypFenster = „Wood window"
	PARAMETERS str_TypFenster = str_TypFenster
endif

! Master Script
if Condition_1 then
	str_TypFenster = „Wood window"
endif
3D Script
3D Display: definitely omit everything in the 3D context that is not visible but has a high polygon count and thus demands processing power.
There are certain elements that only make sense in sections, not in 3D.
Error Control
In frequently used library elements, comprehensive error controls should be built in to prevent error messages from appearing when the user enters invalid parameter values or the object is no longer displayed:
Some examples of error controls:
! --- PEN must not be less than 1 in 2D
IF post_fill_pen < 1 THEN post_fill_pen = 1
! --- check if the "Mixed Fill 50 %" exists, then rrr = 1
fill50 = IND(FILL,"Mixed Fill 50 %")
framefill = fill50
rrr = REQUEST("Name_of_Fill", framefill, fillName)
HOTSPOTS
All hotspots must be provided with an ID, including the non-movable ones, so that dimensions remain dynamic when resizing; hotspots without IDs may result in dimensions not adapting dynamically when the object size changes.
Documentation must be created for each object including macros and submacros covering the use of hotspot IDs to ensure that identical hotspot IDs are not used in different scripts.
E.g. Main object 3D: 1 - 99, Main object 2D: 100 - 199
Macro 3D: 1001 - 1099, Macro 2D: 1100 - 1199
Alternatively, for macros, the ID can be incremented by passing and returned to the main object via Returned Parameters, where counting continues.
In all scripts, only a single identical variable name should be used for incrementing hotspots. This variable does not need to start with an underscore.
e.g.: htsp = 1
HOTSPOT2 A, B, htsp : htsp = htsp + 1
MULTILINGUALISM
For orders from internationally active companies, the foundation for multilingualism should always be laid from the start.
The following points must be observed:
Create a selection parameter for multilingualism: int_language (1 = de, 2 = en, etc.)
Create a macro for all languages or one macro for each language (end script with END _durchgangsbreite, _durchgangshoehe etc. or simply with END _translation)
Define language pairs either as a known variable or as an incremented array variable, e.g.:
_durchgangsbreite = „durchgangsbreite" (IF int_language = 1)
_durchgangsbreite = „egress width" (IF int_language = 2)
_translation[int_language][1] = „durchgangsbreite" (IF int_language = 1)
_translation[int_language][1] = „egress width" (IF int_language = 2)Advantages of variant 1 are better readability when using variables, disadvantage is significantly more complex scripting as you have to use individual RETURNED_PARAMETERS in macros and CALL commands (example see below)Advantages of variant 2 are simpler script creation and shorter macro commands, disadvantage is quite poor readability when inserting variables
Macro call roughly as follows:
a) Variable usage:CALL „translation_object.gsm" PARAMETERS RETURNED_PARAMETERS _durchgangsbreite, _durchgangshoehe etc.
b) Array usage:CALL „translation_object.gsm" PARAMETERS RETURNED_PARAMETERS _translation
With many values, words should be sorted by topics or content meaning and labeled (e.g. UI texts, VALUES values, etc.)
Dictionary usage has proven to be even better for localization.
Example for this (in the macro object):
! ---------------------------------------------------------------------- !
! ---------------------------------------------------------------------- !
DICT local
! ---------------------------------------------------------------------- !
! ---------------------------------------------------------------------- !
IF int_language = 1 THEN
    local.de.aktuell = "aktuell?"
    local.de.Handbuch = "Handbuch"
    local.de.bugs = "Bugs"
    local.de.wuensche = "Wünsche"
ENDIF

IF int_language = 2 THEN
    local.en.aktuell = "uptodate?"
    local.en.Handbuch = "Manual"
    local.en.bugs = "Bugs"
    local.en.wuensche = "Wishes"
ENDIF
Specification (from: Graphisoft® Library Specification)
The first requirement when creating a GDL object is that its purpose and function are clearly defined to get a perfect overview of the object's function: the level of abstraction, the properties, 2D and 3D representation, as well as the representation in sections and elevations. One of the fundamental questions is: what is the object to be used for?
From this, the GDL developer in coordination with the client defines all parameters and their hierarchical structure. The logic of the parameters must be reflected in the arrangement of the parameters; the parameters should be grouped and the relationships between parameters must be clearly defined (and later worked out in the Parameter Script). To ensure this, connections between parameters must be analyzed very carefully.
The client must create specification drawings before work begins on creating a new library element. Specification drawings must contain each display variant of each individual object - as described below:
they must be drawn in different scales if 2D and 3D change their representation depending on the scale
independent versions must be drawn for windows/doors, once with and once without additional elements such as side lights, transoms, crossbars, posts, mullions, wall connections, etc.
they should contain floor plan symbols, section and elevation symbols in a consistently uniform representation style
All values that can be changed by parameters must be marked with consistent letters (floor plan, section, elevation) in dimension lines; all fixed sizes must be marked by numerical values
The programmer should also use variables for fixed sizes later in the script to simplify future changes. To avoid unexpected problems, an additional or internal parameter should be used for all attributes (pen or fill), which can be easily changed from one version to another.
The drawings must show the model in any case as it should look afterwards. To avoid misunderstandings, sketches that are less detailed than the desired result cannot be accepted.
The specification drawings must contain everything that is important to the client. The programmer cannot build things into the object that are not shown in the specification drawings.
The key is good communication between client and programmer. This is also important so that serious changes are not necessary at an advanced stage of object development.
Prototypes (from: Graphisoft® Library Specification)
Normally it is impossible to clearly specify requirements for a functionality that does not yet exist in advance. Prototypes are therefore a good solution for clients and programmers to communicate requirements and specifications with each other. To present requirements and their possible solutions in an advanced form, a prototype object should be created for an object or for basic object types of a library.
Prototypes must be checked very carefully by the client. They should contain all parameters, options and properties of the finished library element. Very often this is not possible at an early stage of development, so library elements should be prepared in such a way that modifications are easily possible. For this reason, a library element should never be considered as the ultimate solution for the client's requirements.
Quality Management
The more extensive a project or object is, the more important comprehensive quality management becomes to achieve consistently high quality standards and to eliminate unavoidable bugs.
Quality assurance is not the last link in the development chain, it is a step in the ongoing process of agile software development. Testing takes place in every development phase. Accordingly, software testing must be integrated into the daily development process as a regular and ongoing development step.
Important parts of quality management include setting standards, a checklist for implementing standards, verifying compliance with standards, careful traceable documentation of the development process with documentation templates, and comprehensive beta testing with bug reporting and bug fixing.
Elements of a standard beta test:
Standard question catalog: Geometry
Standard question catalog: Logic
Standard question catalog: User Interface
Standard: Are invalid entries excluded?
Project question catalog: Product logic, were the specifications implemented?
Testing in different environments: 2D, 3D, section, elevation, rendering, hotspot editing, list evaluation, stories, model representations
Tests on Windows and MAC